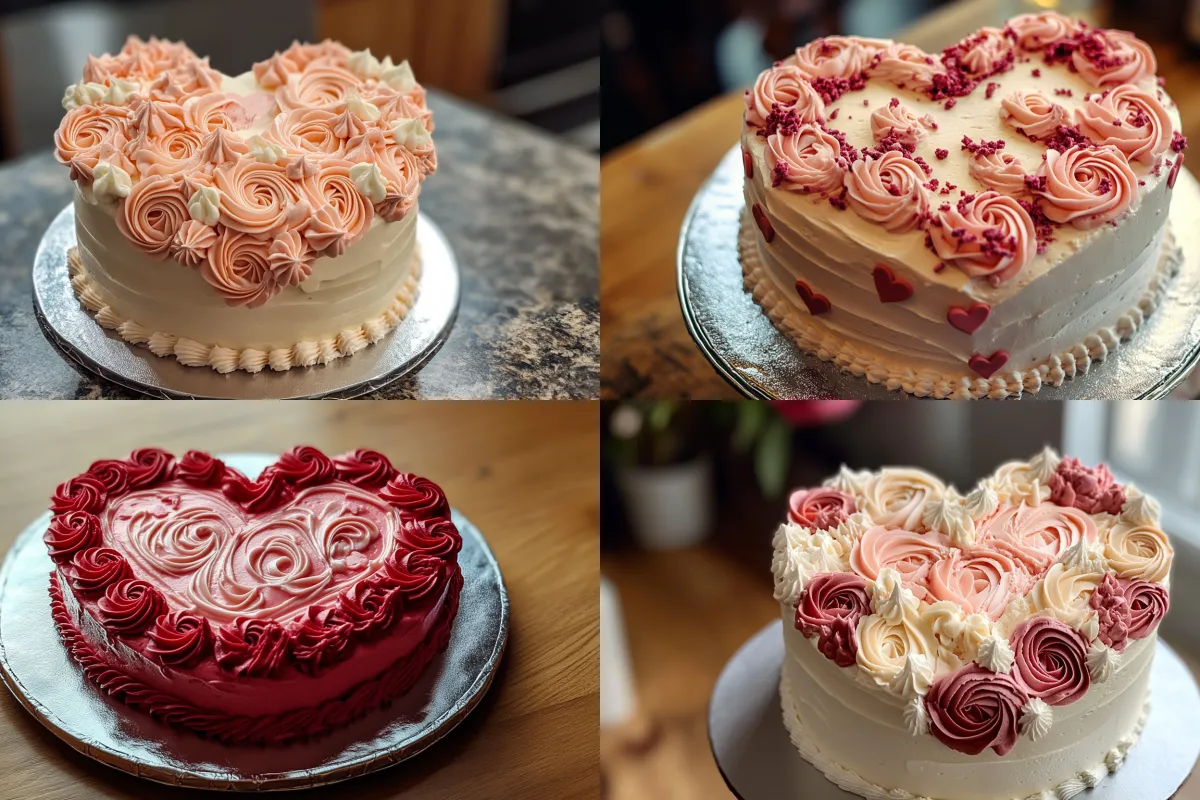
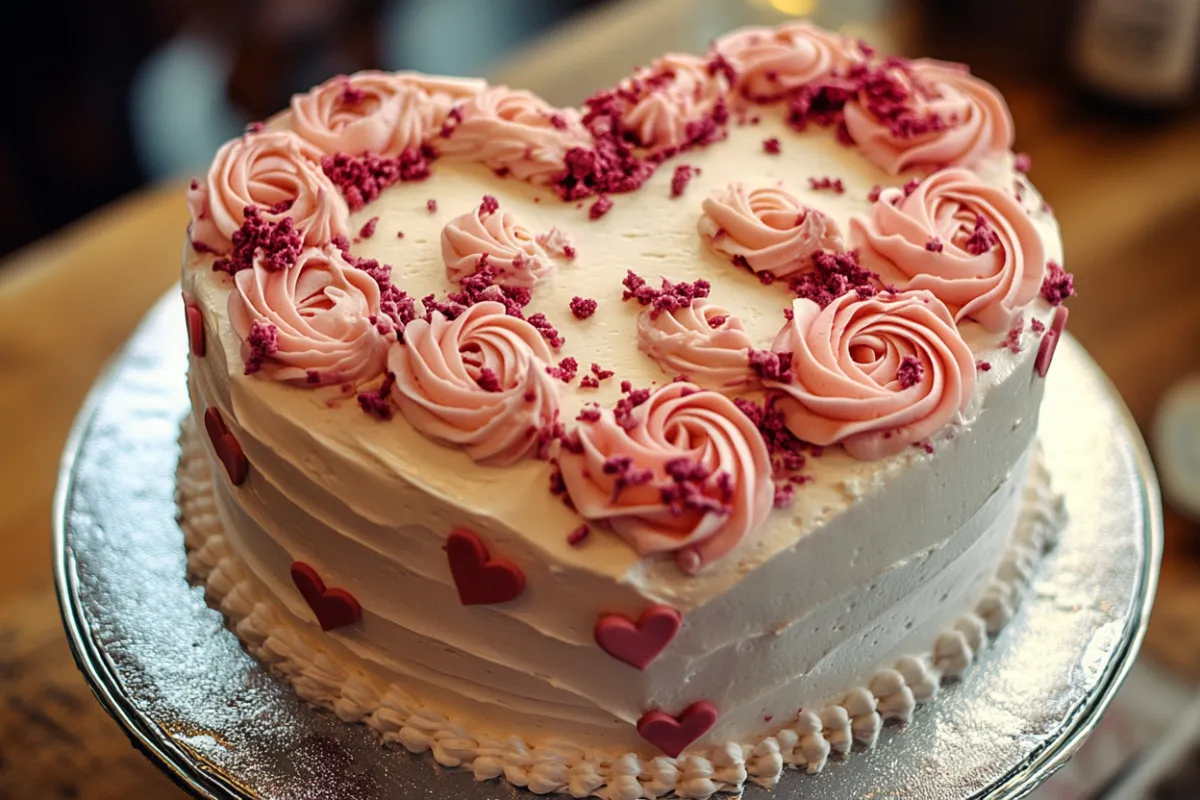
Vintage heart cakes have been making a remarkable comeback in recent years. Whether you’re baking for Valentine’s Day, a wedding anniversary, or a retro-themed party, these heart-shaped cakes ooze charm, elegance, and a nostalgic flair. This article will provide a comprehensive guide on how to create your own vintage heart cake, including baking tips, decorating techniques, and the history behind this delightful cake. We’ll dive deep into how to recreate the old-school look and feel of vintage cakes, ensuring you’ll have the perfect centerpiece for any special occasion.
Let’s explore everything you need to know about making the vintage heart cake—from its origins to the final decorating touch.
The History of Vintage Heart Cakes
The idea of the vintage heart cake harks back to the 1950s and 60s when cakes were often symbols of celebration, affection, and indulgence. Heart-shaped cakes became a favorite during romantic celebrations like Valentine’s Day and anniversaries, and they were often adorned with intricate piping, pastel colors, and delicate edible decorations.
Back then, cakes were more than just a dessert. They were centerpieces at events, often taking hours to decorate with buttercream roses, lace-like icing, and other intricate patterns. The aesthetic of these cakes is characterized by soft pastels—baby pinks, mint greens, and delicate yellows—that give off a warm, nostalgic feeling. Recently, with the resurgence of all things retro, the vintage heart cake has come back into fashion, and people are now searching for ways to bring this classic cake back into modern-day celebrations.

To recreate the authentic look, modern bakers often use techniques popularized in the mid-20th century, like piped flowers and scalloped edges. If you’re looking for tips on perfecting retro designs, check out this guide on retro cake decorating techniques.
Ingredients and Tools for a Vintage Heart Cake
Before you start baking your vintage heart cake, make sure you have all the necessary ingredients and tools. You’ll want to strike the perfect balance between an aesthetically pleasing exterior and a flavorful, moist interior. Here’s what you’ll need:
Ingredients:
- Flour: The foundation of your cake. Opt for cake flour if you want a light, airy texture.
- Sugar: Both granulated and powdered sugars are essential for the cake and frosting.
- Butter: Adds richness and depth to both the cake and buttercream frosting.
- Eggs: They act as the binding agents and provide structure.
- Milk or Buttermilk: For moistness and a subtle tangy flavor, buttermilk is preferred for vintage-style cakes.
- Vanilla or Almond Extract: Almond is a particularly retro flavor, bringing back memories of classic cakes.
- Baking powder and baking soda: These leavening agents help the cake rise beautifully.
- Buttercream frosting ingredients: Butter, powdered sugar, vanilla extract, and milk.
Special Tools:
- Heart-shaped cake pans: For a perfect heart shape, you’ll need a heart-shaped pan. If you don’t have one, you can learn how to make a heart-shaped cake with a round cake and some creative cutting techniques.
- Piping bags and tips: Essential for creating the beautiful details that make a vintage heart cake stand out. Tips with different nozzles will help you achieve roses, scallops, and other classic designs.
- Turntable: While not mandatory, a cake turntable can make frosting and decorating much easier, especially when trying to get smooth, even sides.
- Offset spatula: Perfect for smoothing frosting or applying a thin layer of crumb coat.
Make sure to gather all your ingredients and tools before you start. A well-organized workspace is key to creating a flawless cake, both in taste and appearance.
How to Make a Vintage Heart Cake: Step-by-Step Guide
Creating a vintage heart cake from scratch might seem challenging, but with the right guidance, it’s achievable even for beginner bakers. Below is a comprehensive step-by-step guide to help you make a stunning vintage cake.
Step 1: Preparing the Cake Batter
The first step is to prepare a classic cake batter that is light and flavorful. You can opt for a classic vanilla sponge cake or explore vintage flavors like lemon chiffon, almond, or even red velvet. To achieve that perfect crumb, use cake flour, as it’s finer than all-purpose flour.
- Cream the butter and sugar until fluffy and pale.
- Add the eggs one at a time, ensuring each is fully incorporated before adding the next.
- Alternate adding the dry ingredients (flour, baking powder, and salt) with wet ingredients (milk or buttermilk) to keep the batter smooth.
- Finally, add vanilla or almond extract for a vintage flavor twist.
Step 2: Baking the Cake
After the batter is ready, pour it into your heart-shaped cake pan. Make sure the pan is properly greased to avoid sticking.
- Preheat your oven to 350°F (175°C) and bake the cake for about 25-30 minutes, or until a toothpick inserted in the center comes out clean.
- Let the cake cool completely before frosting. Rushing this step can lead to melted frosting or a crumbling cake.
Step 3: Layering and Frosting the Cake
Once the cake is cool, it’s time to layer and frost it. You can add a filling of your choice—think vintage jams or buttercream between the layers. Red raspberry or apricot preserves are popular choices for a truly retro feel.
- Apply a crumb coat: This thin layer of frosting helps to trap any loose crumbs and provides a smooth base for your final layer of frosting.
- Frosting techniques: Use your offset spatula and piping bags to apply the frosting. Make sure the final coat is smooth and even before adding decorative elements.
Decorating Tips for a Vintage Heart Cake
The hallmark of any vintage heart cake is its beautiful, intricate decorations. To achieve the perfect vintage look, focus on pastel colors, piping techniques, and delicate embellishments.
Piping Techniques
To give your cake a true vintage vibe, try incorporating classic piping techniques:
- Scalloped edges: Use a piping bag with a round or star tip to create gentle waves along the edge of your cake.
- Roses and flowers: These were common on vintage cakes, and with the right piping tip, they’re easy to recreate. Practice on parchment paper before decorating your cake.
- Pearls and dots: Vintage cakes often have small pearl-like dots or lines along the edges.
If you’re new to piping, practicing on a sheet of wax paper before applying the frosting to your cake is a great way to build confidence. For a more in-depth guide to decorating, see retro cake decorating techniques.
Color Schemes
The traditional color palette for a vintage heart cake includes soft pinks, blues, and whites. Pastel shades are quintessentially retro, and you can experiment with various hues to give your cake a unique, yet classic, touch.
- Soft pinks and blues: Use food coloring sparingly to achieve these pastel tones.
- Edible embellishments: Top your cake with edible pearls, fondant flowers, or sprinkles to enhance the vintage aesthetic.
Popular Vintage Heart Cake Variations
When making a vintage heart cake, you can add your own twists by trying different cake flavors, sizes, and designs. Here are a few popular variations that will keep your cakes exciting and memorable.
Mini Heart Cakes
Instead of making one large heart cake, consider creating individual mini heart cakes for guests. These personal-sized cakes are both adorable and practical, allowing for easy distribution at parties. You can still apply the same vintage decoration techniques, but in smaller portions.
Layered Heart Cakes
Layered cakes are a staple of vintage baking, often filled with buttercream or fruit preserves. Creating multiple layers adds height and grandeur to your cake. You can alternate different flavors in each layer—like a lemon layer paired with a strawberry layer—for a surprise with every bite.
Vintage Flavors
While vanilla and chocolate are common, vintage cakes often feature flavors that have a bit more nostalgia, such as:
- Red velvet: A popular Southern classic.
- Strawberry shortcake: With layers of strawberries and whipped cream.
- Almond cake: A delicate flavor that harks back to old-fashioned recipes.
For more ideas on vintage-inspired flavors, check out this list of 1950s cake recipes.
Advanced Techniques for Vintage Cake Decoration
If you’re ready to level up your vintage cake-making skills, these advanced techniques will help you achieve a professional look.
Using Piping Tips for Intricate Designs
Different piping tips can create unique effects that will set your cake apart. A star tip is great for creating flowers and scallops, while a round tip can give you the precision needed for writing messages or creating small dots.
Mastering Buttercream Artistry
Buttercream isn’t just for frosting—it can be used for creating stunning 3D decorations. Mastering buttercream roses, leaves, and intricate borders takes practice, but the results are worth the effort.
- Buttercream rosettes: These are created by swirling the buttercream in a spiral pattern.
- Lacework: Piped lace details can give your cake an elegant, vintage finish.
Using Royal Icing for Sharp Edges
Royal icing hardens as it dries, making it perfect for decorations that need to maintain their shape. Use it for piping sharp details or to create decorations in advance that can be placed on the cake after hardening.
Serving and Presenting a Vintage Heart Cake
The presentation of your vintage heart cake is just as important as the cake itself. Here’s how to present it in a way that reflects its timeless beauty:
- Vintage cake stands: Elevate your cake by placing it on a vintage-inspired cake stand. Look for ones with ornate details or glass covers.
- Doilies and ribbons: Adding lace doilies or tying a pastel ribbon around the base of the cake can enhance its nostalgic charm.
- Slicing the cake: Use a sharp, non-serrated knife to slice the cake cleanly without ruining the delicate decorations. You can also consult how to cut a heart-shaped cake evenly for more tips on portioning.
FAQs
What Makes a Cake “Vintage”?
A cake can be considered vintage based on its design elements, which often include pastel colors, piped flowers, and elaborate, yet delicate decorations reminiscent of the 1950s and 60s.
How Do I Store a Vintage Heart Cake?
To store a vintage heart cake, place it in an airtight container to keep the cake fresh and prevent the frosting from drying out. If you’ve used perishable fillings like cream cheese or fresh fruit, refrigerate the cake to maintain its freshness.
Can I Use Modern Flavors in a Vintage Cake?
Yes, while classic flavors like vanilla, almond, and strawberry are typical, modern flavors like salted caramel or matcha can provide a fun twist on the traditional vintage cake design.
Do I Need a Special Pan for a Vintage Heart Cake?
You don’t necessarily need a special pan. You can create a heart shape by creatively cutting a round cake, as explained in this guide.
Conclusion
A vintage heart cake is more than just a dessert—it’s a nostalgic journey through time. From its delicate decorations to its delightful flavors, this cake is a celebration of love, artistry, and nostalgia. By following the steps outlined in this guide, you can create your own beautiful vintage cake, perfect for any special occasion. Whether it’s for a wedding, anniversary, or a retro-themed party, your cake will be the centerpiece that everyone will admire.
Experiment with different flavors, colors, and decorations, and most importantly, enjoy the process of creating something that brings joy to you and your loved ones.

